
This post will show you how to check to see if the vShield drivers are installed and if not how to install them via VMware Tools. You may be using an anti-virus software such as Trend Deep Security whereby its throwing up anti-malware engine offline errors which could be linked to the vShield drivers missing.
- First thing is to log onto the virtual machine and open up msinfo32 via the run prompt (start > run > msinfo32).
- Expand “Software Environment” and then “System Drivers”
- Within this list you’re looking for vsepfit as shown below:
![]()
If you see the driver listed, then vShield is installed. if not, continue on with this post.
First ensure VMware Tools is installed, it could be as simple as you forgot to install the tools. If not, then vShield may have been implemented after some VMs were created or something odd has happened. Follow the next steps to add the vShield drivers to existing VMware tools.
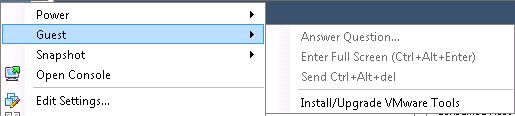
Locate the VM within vSphere and right-click Guest>Install/Upgrade VMware Tools.
Select Interactive Tools upgrade.
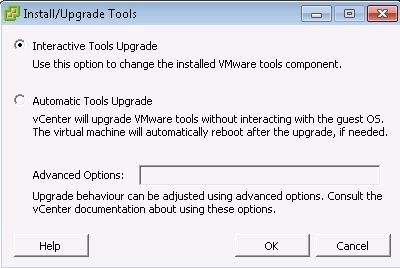
Go to the console of the VM and you should see the installation wizard. Click Next.

Ensure Modify is selected. Click Next.

Expand VMware Device Drivers. Click Next.

Expand VMCI Driver, click the drop down on vShield Drivers and select “This feature will be installed on local hard drive”.
Now the vShield Drivers should look like the following. Click Next.

VMware Tools is now ready to begin installation. Click Modify.

Installing…

and we’re done! Click finish.

You will be asked to restart. Assuming now is a good time, click yes.

That’s the vShield drivers installed.