I have been trying to learn PowerShell and this is my first attempt at a script that just works. This PowerShell script will put a XenDesktop VDI into maintenance mode, disable the object in Active Directory and shutdown the VM in vCentre as well as moving between containers (if required). This is handy if you have a lot of VDIs that need to decommissioned.
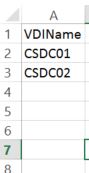
See below for the script, you will need to ensure a list of names are in a CSV called IMPORT_DecomissionVDI.csv. The reason for the ‘IMPORT’ is I find it easier to keep track of what a CSV does, so ‘EXPORT’ / ‘IMPORT’ etc. The same goes for the PowerShell script files ‘Set’ if it’s going to change something and ‘Get’ if it’s going to return information. Handy so you don’t run the wrong script!!
An example of what the CSV should look like:
Don’t forget to change the variables at the start.
#========================================================================
# File: Set-DecommisionVDI.ps1
#
# Description: This script imports a list of VDIs to be disabled, sets the VDI in XenDesktop in maintenance mode, then disables the AD account
# and moves to an OU if required. Lastly the script moves the VDI in vCentre if required and shuts down the VDI.
#
# Date: 12/09/14 11.52 PM
# Author: Chris Stark
# Version 0.1
# Blog: ChrisStark.co
# Twitter: twitter.com/ChrisLStark
# Google+: http://google.com/+ChrisStark86
# LinkedIn: http://www.linkedin.com/profile/view?id=clstarks
# Link: http://chrisstark.co/2014/09/powershell-script-decommision-vdi-xendesktop-vcentre/
#========================================================================

# Imports Citrix and VMware PowerShell snapins

Add-PSSnapin Citrix.*
Add-PSSnapin VMware.VimAutomation.Core

# Variables for Citrix XenDesktop Server, vCentre, Domain and paths to move VDIs

$Domain = ' '
$XenDesktop = ' '
$VCentre = ' '
$CSVFile = 'IMPORT_DisableVDIs.csv'
$DisableADPath = 'OU=Disabled Computer Accounts,DC=DOAMIN,DC=co,DC=uk'
$VcentreFolder = "Disabled VDIs"

# Connects to the Citrix XenDesktop server

Get-BrokerSite -AdminAddress $XenDesktop

# Connects to VMware vCentre

Connect-VIServer $VCentre

# Imports the list of computers to disable

$CSV = import-csv $CSVFile

# Loops through the VDIs

foreach ($Item in $CSV)
{
# Sets the variable VDIName to the name of the VDI being disabled

 $VDIName = $Domain+$Item.VDIName

# Sets the VDI to maintenance mode

 Get-BrokerDesktop -MachineName $VDIName | Set-BrokerPrivateDesktop -InMaintenanceMode $true

# Disables the AD account of the VDI

 Get-ADComputer $VDIName | Set-ADComputer -Enabled $false

# Moves the VDI to the disabled OU - remove line if not required

 Get-ADComputer $VDIName | Move-ADObject -TargetPath $DisableADPath

# Moves the VM to the Disabled VDIs folder - remove line if not required

 Move-VM -VM $VDIName -Destination $VcentreFolder

# Shuts down the VDI

 Get-VM $VDIName | Shutdown-VMGuest -Confirm:$false
}